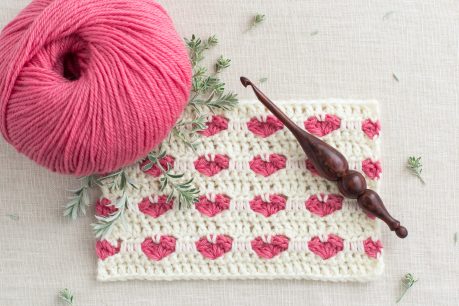
How To: Crochet The Mini Bean Stitch – Easy Tutorial
Whenever I hear the word ‘beans’, it instantly sparks a memory of a little Olivia, excitedly (and somewhat patiently) waiting as the bean seed she had carefully laid out on a paper towel finally sprouted tiny buds of vibrant life after being meticulously watered day after day.
It may come as no surprise then, that the day I discovered this particular stitch I instantly fell in love with it’s unique, woven design, and the fact that every time I used it I was flooded with fond childhood memories.
The Mini Bean Stitch creates a dense and tightly woven fabric, closely resembling adorable little beans… Perfect to use when crocheting those snuggly scarves and cozy afghans, as this stitch is reversible and works up into a delightfully warm fabric!
Learning a new crochet stitch or technique is always such fun, don’t you agree? If you’re keen to challenge yourself this weekend (as you’re cozied up by the fireplace), you’re in luck as this helpful step-by-step video tutorial will guide you through all the necessary steps needed to learn the “Mini Bean Stitch, in an easy to follow speed!

Materials
Yarn – Quince & Co. Chickadee (Sport/5ply)
Furls Crochet Hook – 4.0mm (G/6)
Stiches & Abbreviations
st(s) – stitch(es)
ch – chain stitch
mb st – mini bean stitch
Mini Bean Stitch (mb st)
Insert hook in next st, yo, draw up a loop (2 loops on hook). Yo, insert hook in same st, yo, draw up a loop (4 loops on hook). Yo, pull through all 4 loops, ch1 (counts as the top of mb).
Foundation
Chain in multiples of 2 + 1.
Pattern
Row 1: Skip 2 ch, 1 mb st in next ch. *Skip 1 st, 1 mb st in next ch. Repeat from the * all across. Turn your work.
Row 2: Ch1, *1 mb st in the side of the next mb st from the previous row (working into the side loop of the mb st, not the top of the st). Repeat from the * all across. Turn your work.
Repeat
Row 2 until you reach your desired length.
Is there a specific crochet stitch or interesting technique you’d love to learn? I’m always open to new ideas and inspiration when it comes to sharing crochet with the world!
Be sure to use the tag #hopefulhoneyhive on Instagram to show me your mini bean stitches!
Have a lovely day crocheting…


So lovely! Great tutorial!
Hello,
thank you for this tutorial. Lovely stitch. I was searching for some fast and small project for Christmas gifts and this will help me a lot:) Thank you<3
Fabulous and easy to follow thankyou
I was looking at different patterns and I love how you explain the stitches. You are a great teacher. I’m going to use this stitch for a blanket. I want to learn the spider stitches but at this time, i’m not doing such a great job…oh well, newbie blues 🙂 thanks again for sharing!!!
I like it’s
i dont think that i can make it like this anyway in my lifetime 🙁 it is saddening but i will do try all my best. thank you for teaching.
This is very simple, but so effective! I love the design and I will definitely make one for myself:) Have a nice day
Embroidery Machines
You forgot to include the ch1 after each mb st In the written instructions.
Learned a new stitch thanks will finish next snowflake and start a new bean stitch baby blanket
Love the instructions , they are very clear . The stitch looks lovely can’t wait to try it out . Thank you .
I’ve heard of the bean stitch but never tried it.
This look easy to do.
thanks so much.
I’ve done the bean stitch it almost looks like a popcorn stitch I’ve made quite a few hats with that stitch just love it! Also very easy
Very well described and nicely illustrated.