Ruby Red Mary Jane Booties Crochet Pattern

From the very first day I was introduced to the magical world of the Wizard of Oz, Dorothy’s ruby red slippers were a point of fascination. Being only a tiny tot the first time I ever saw the movie, I loved watching her vibrant heels click along the yellow brick road as she went on her way.
Prepared to go on your own magical journey? Pick up that nifty hook and a skein of yarn and come along on this fun adventure. It won’t be long before your little one will be clicking her heels together in these darling Ruby Red Mary Jane Booties.
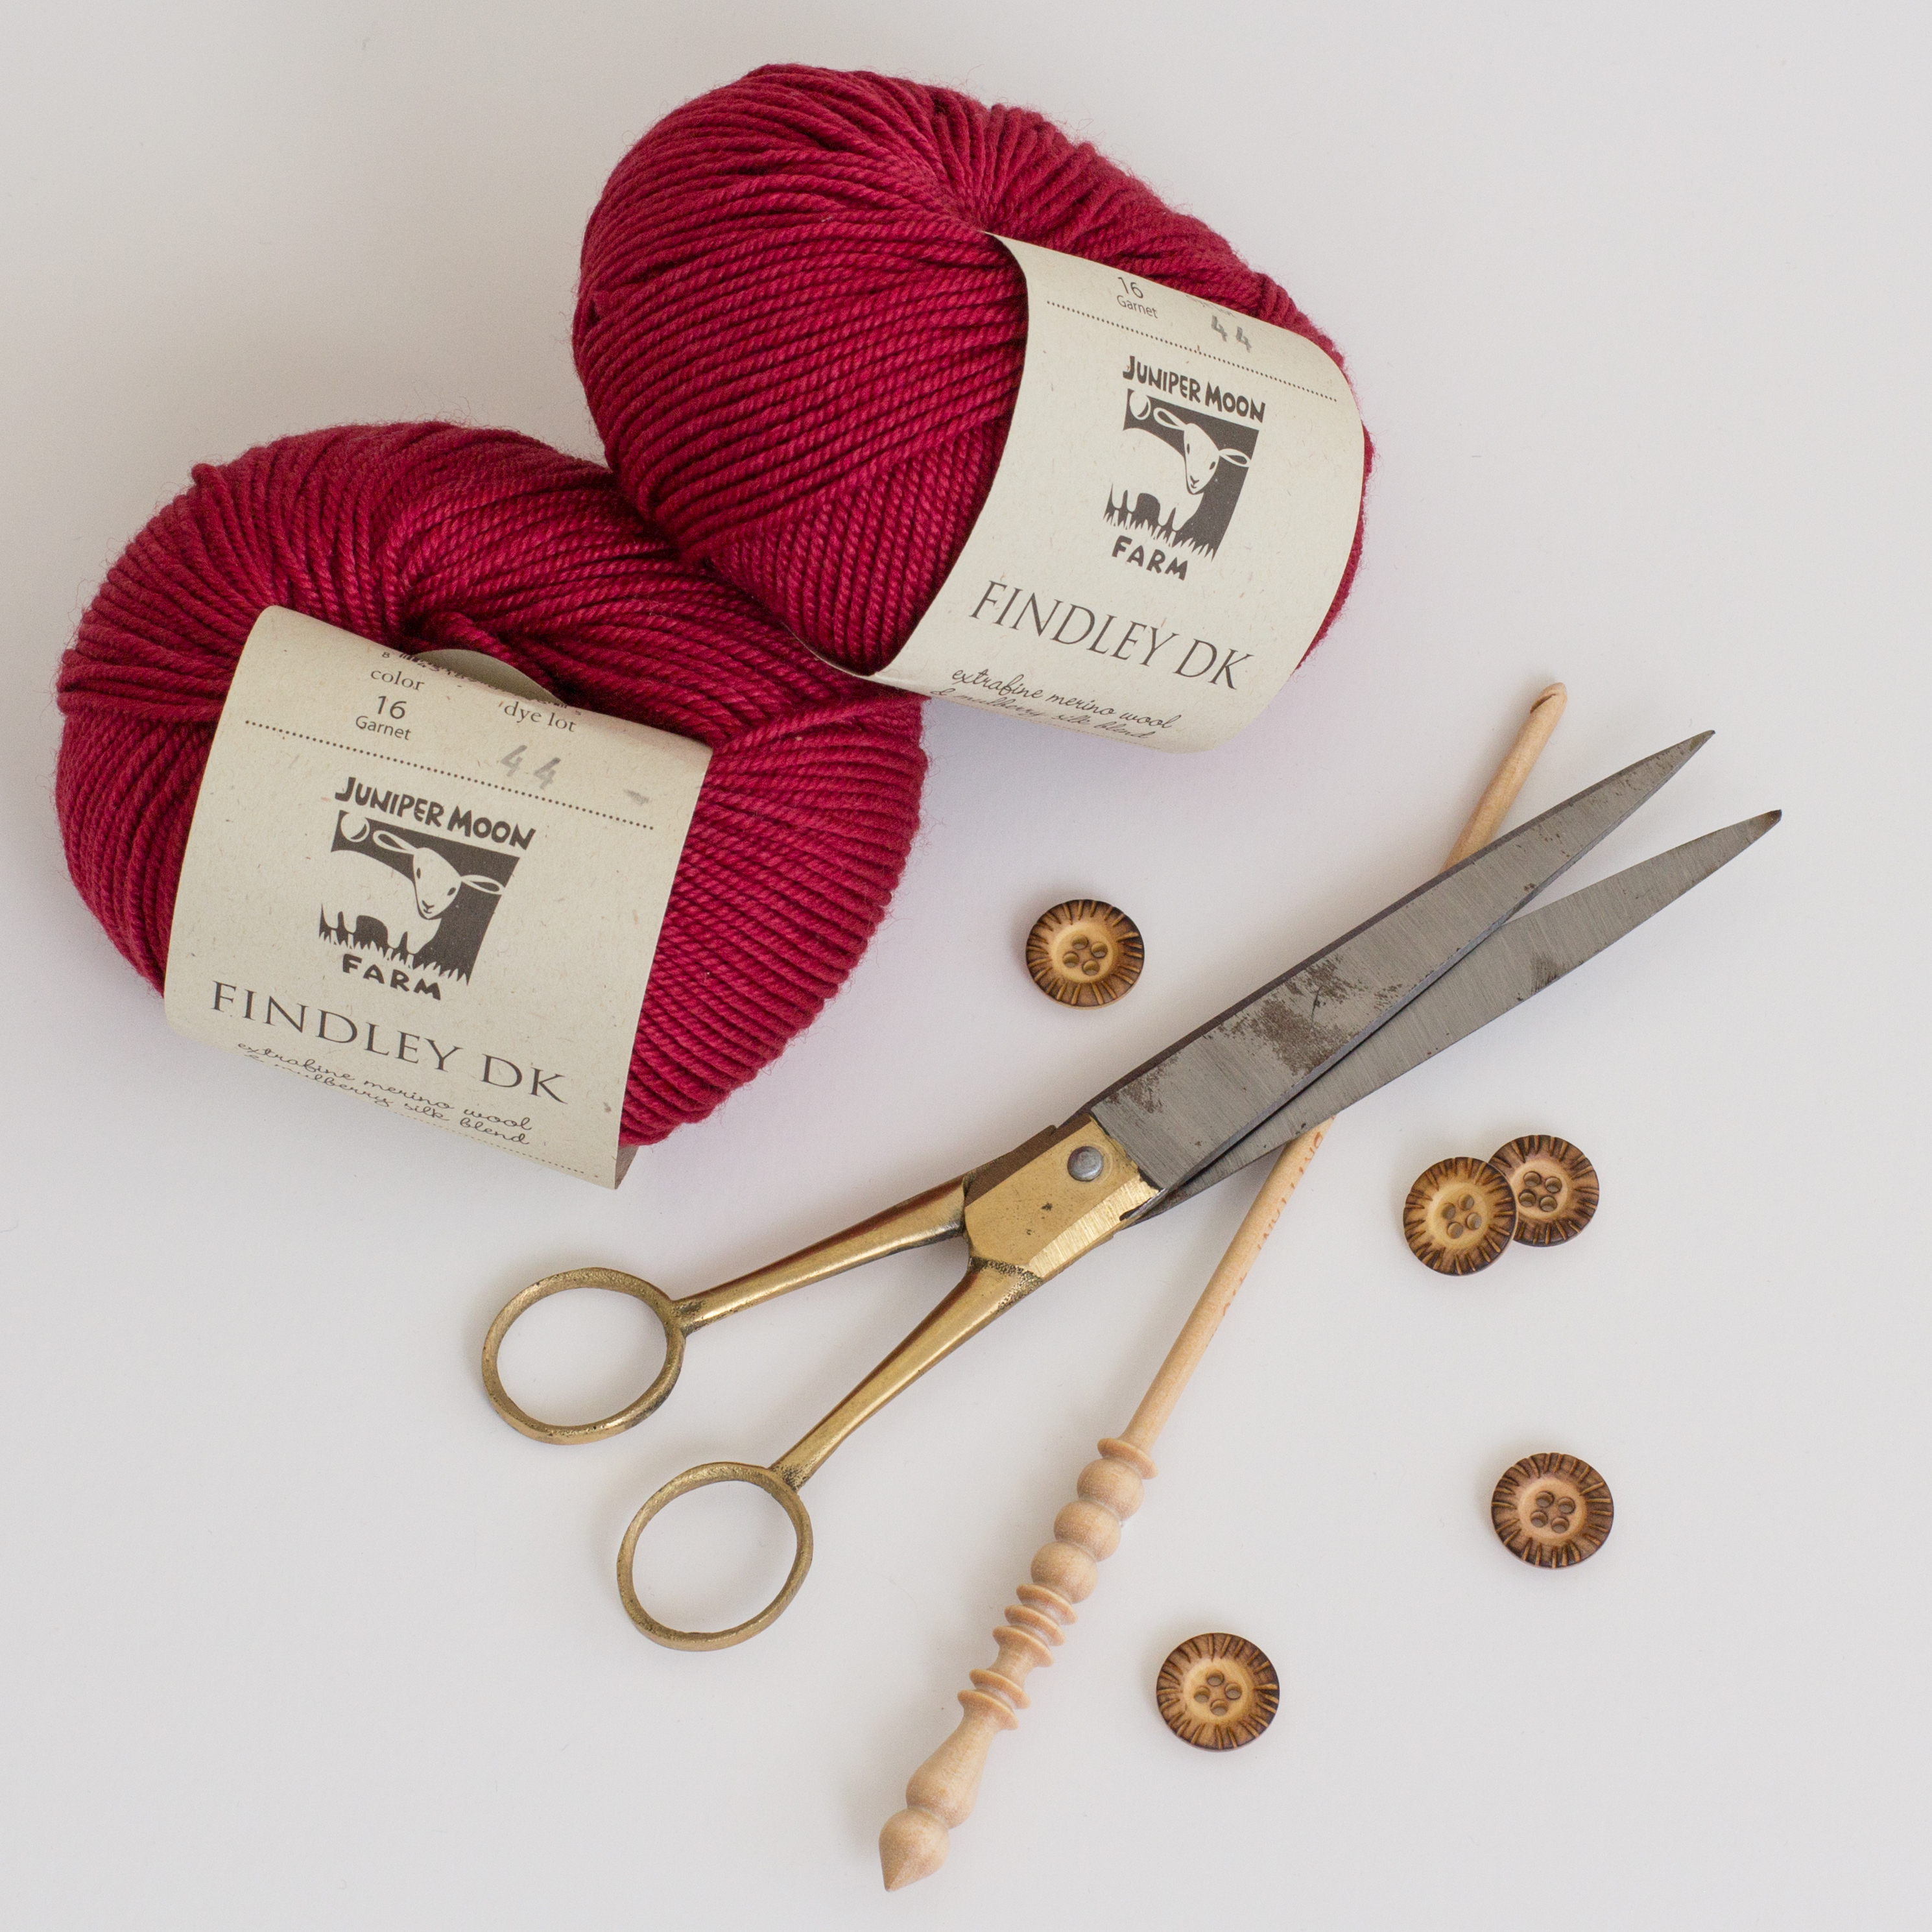
For quite some time now I’ve envisioned creating these pair of dainty, crocheted, red slippers but just couldn’t seem to find just the right yarn for the design. When I received a special delivery from KnittingFever some time back, and discovered a couple of incredibly soft skeins of wool in the most beautiful, garnet red I knew it was a match made in heaven… Don’t you agree?
Your little lady can never have too many pairs of booties, so be sure to also whip up this darling pair of Pink Lady Booties and Ice Cream Swirl Booties…

Materials
3.5mm (E/4) Crochet Hook
110yds [130yds] Juniper Moon Farm Findley DK (131yds/50g)
Tapestry Needle
2x Pearl Buttons (0.4″)
Finished Size
Pattern is made for 0 – 6 months old. Changes for size 6- 12 months are in [ ].
Finished Measurements (Sole Length)
0 – 6 Months: 3.5″ (9cm)
6 – 12 Months: 4″ (10cm)
Gauge
20 stitches + 16 rows = 4″/10cm in half double crochet
Stitches & Abbreviations
st(s) – stitch(es)
ch – chain stitch
sl st – slip stitch
sc – single crochet
hdc – half double crochet
blsc – back loop single crochet
sc2tog – single crochet 2 together
Single Crochet 2 Together (sc2tog)
Insert your hook into the next stitch. Yarn over, pull back through that stitch (2 loops on hook). Insert your hook into the next stitch. Yarn over, pull back through that stitch (3 loops on hook). Yarn over, pull through all the loops on your hook.
Back Loop Single Crochet (blsc)
Insert your hook into the next stitch, but not through both loops, only through the “Back Loop”. Yarn over, draw up a loop (2 loops on hook). Yarn over, and pull through 2 loops on your hook.
Skill Level
This is an “Easy” level crochet pattern (includes “How-To” photos). You must be familiar with basic crochet stitches and techniques. Directions written so that they are easy to read and follow. All patterns are in English, and written in standard US terms.

+ PATTERN
Note: This bootie is worked in the round, from bottom to top. The bow is worked in the row, and seamed to the front of the bootie.
+ SOLE
Ch11 [13] using yarn and 3.50mm hook.
Rnd 1: 2 hdc in 2nd ch from hook, 1 hdc in next 8 [10] sts, 5 hdc in next st. (Note: You are now going to be working on the opposite side of foundation chain.) 1 hdc in next 8 [10] sts. 3 hdc in last st. (26 [30] sts) Do not sl st in 1st hdc of this rnd.
Rnd 2: Start crocheting in 1st st from the previous rnd. 2 hdc in next 2 sts. 1 hdc in next 8 [10] sts. 2 hdc in next 5 sts. 1 hdc in next 8 [10] sts. 2 hdc in next 3 sts. (36 [40] sts) Do not sl st in 1st hdc of this rnd.

Rnd 3: Start crocheting in 1st st from the previous rnd. *2 hdc in next st. 1 hdc in next st. Repeat from the * twice. 1 hdc in next 8 [10] sts. *2 hdc in next st. 1 hdc in next st. Repeat from the * 5 times. 1 hdc in next 8 [10] sts. *2 hdc in next st. 1 hdc in next st. Repeat from the * 3 times. Sl st in 1st st of this rnd. (46 [50] sts)
Fasten off, and weave in loose ends.
+ TOP OF SHOE
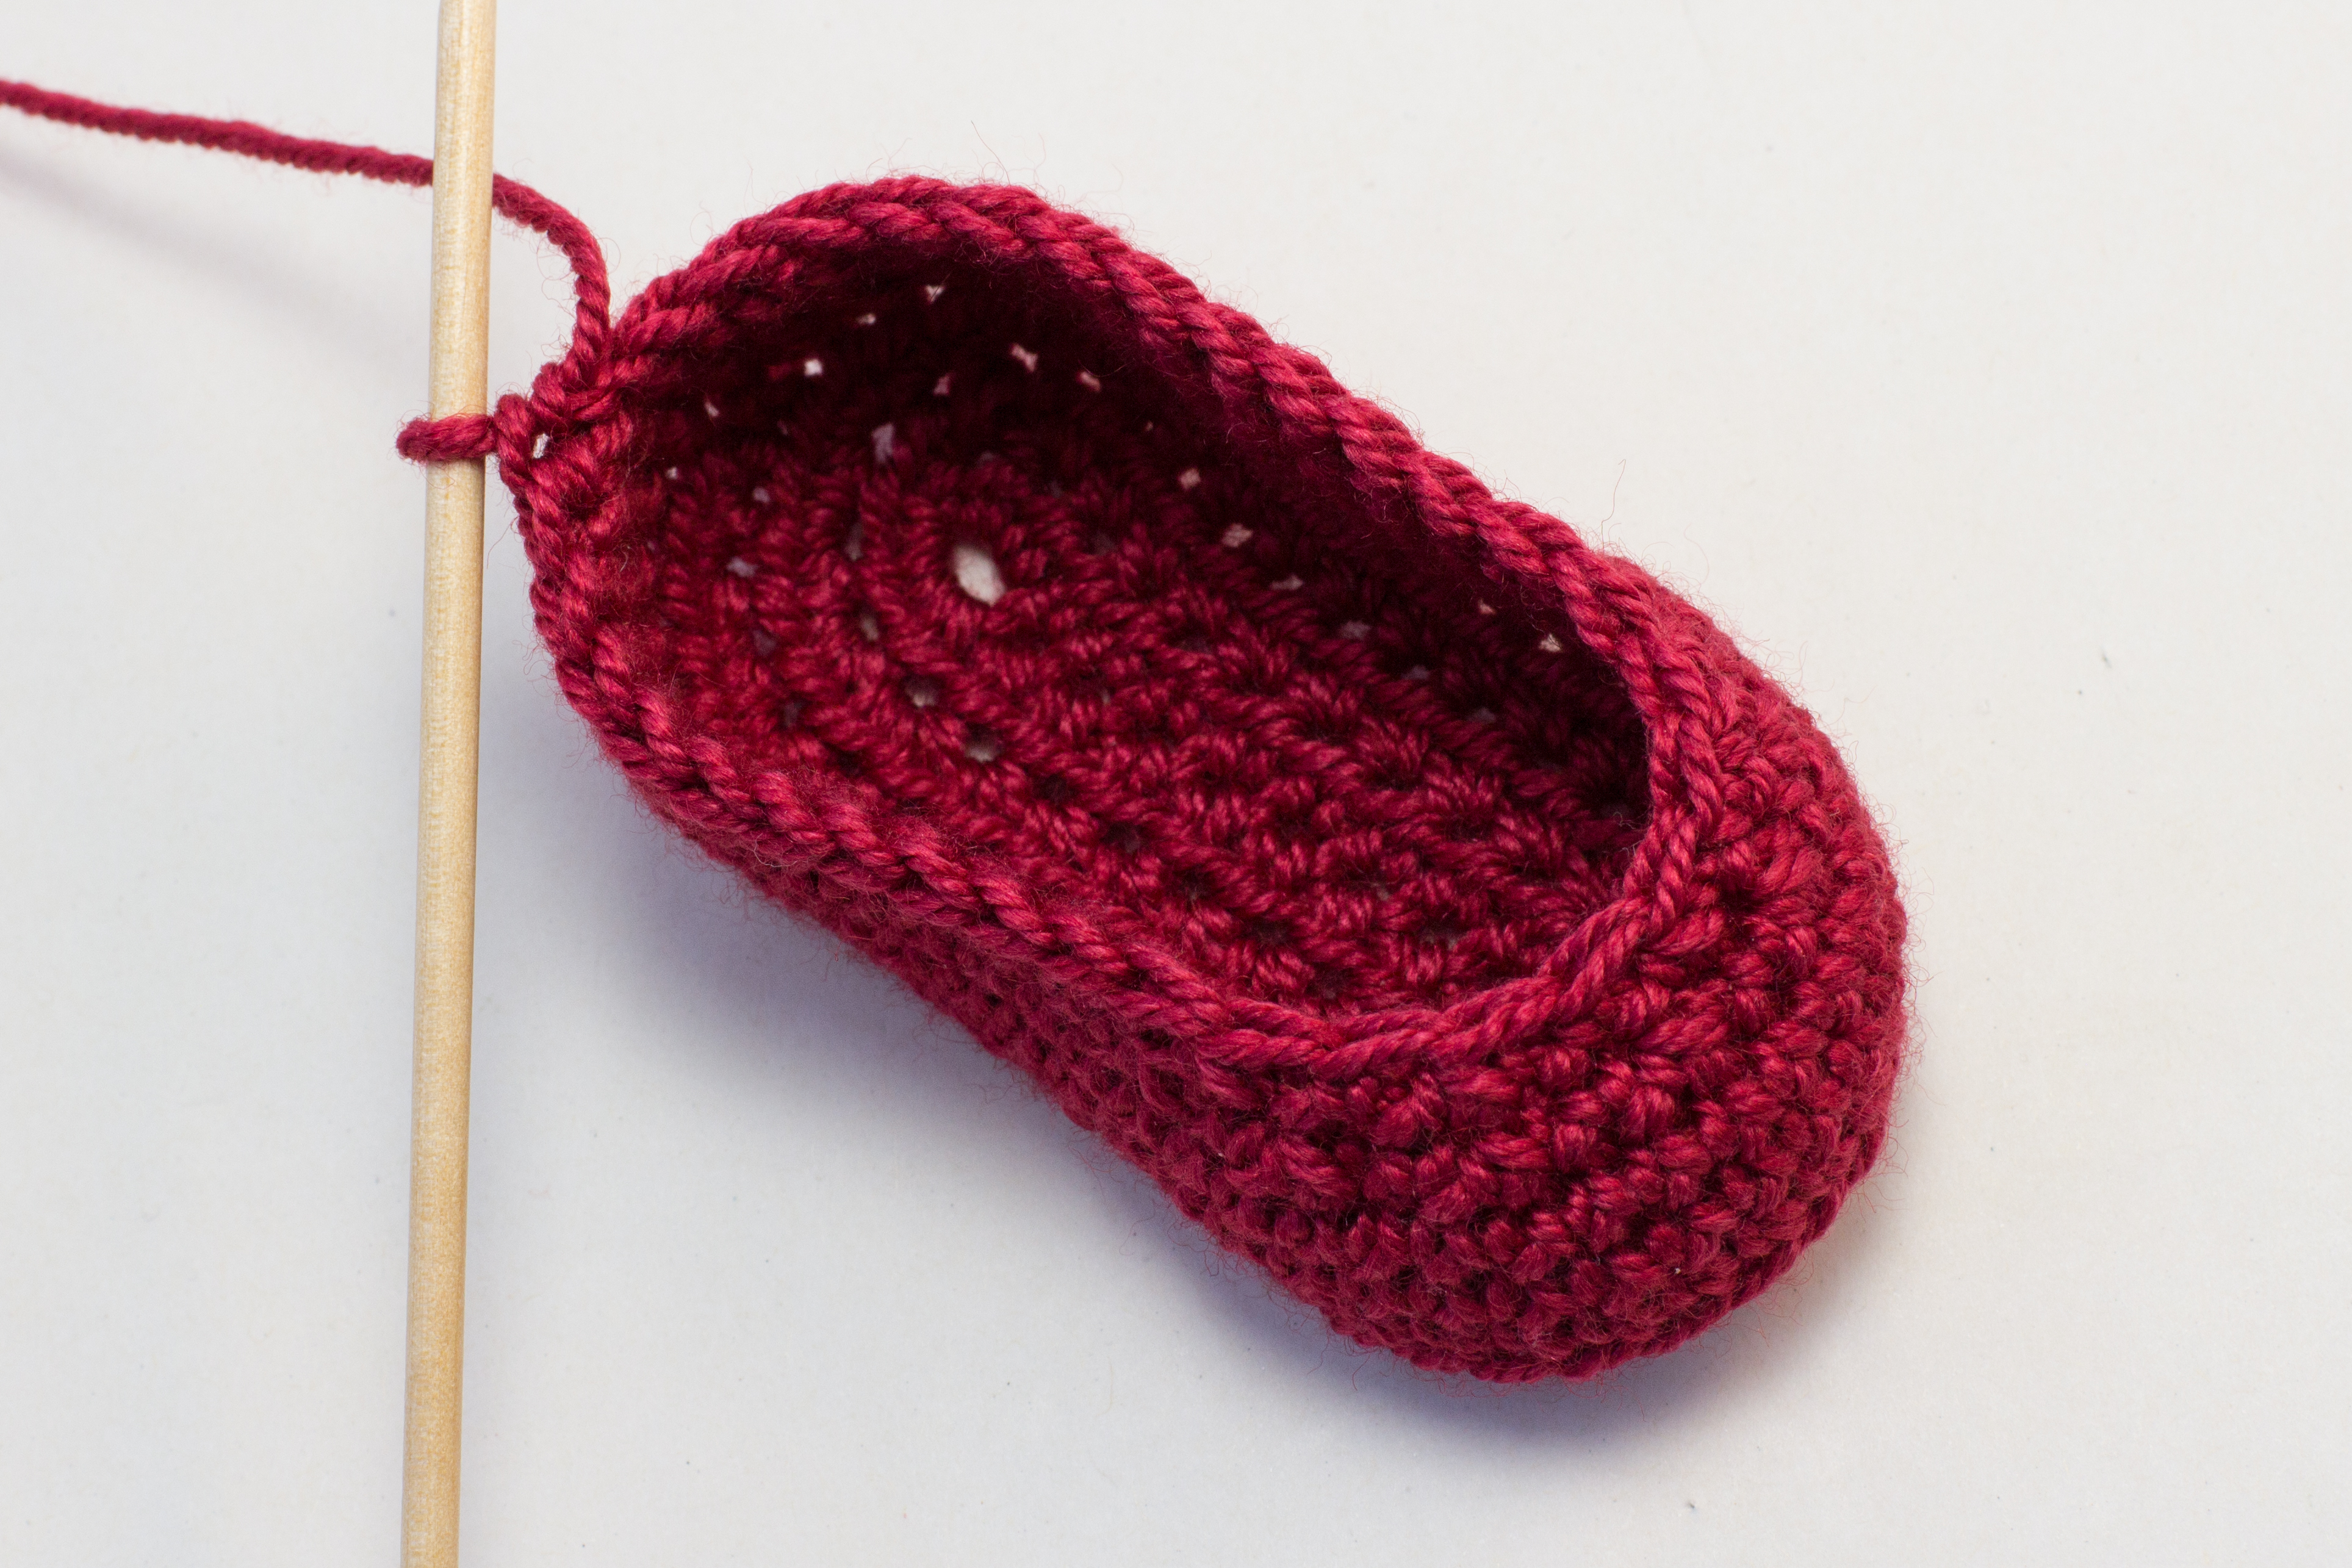
Rnd 1: Attach yarn right in the middle of the heel. Ch1, 1 sc in the same st, but only through the back loop. (Note: Continue crocheting the sts in this rnd, only in the back loop.) 1 sc in next 45 [49] sts. Do not sl st in 1st sc of this rnd. (46 [50] sts)
Rnd 2 – 3 [4]: Start crocheting in 1st st from the previous rnd. 1 sc in every st all around. Do not sl st in 1st sc of this rnd. (46 [50] sts)
Rnd 4 [5]: Start crocheting in 1st st from the previous rnd. 1 sc in next 13 [15] sts. *1 sc2tog. 1 sc in next st. Repeat from the * 7 times. 1 sc in next 12 [14] sts. Do not sl st in 1st sc of this rnd. (39 [43] sts)
Rnd 5 [6]: Start crocheting in 1st st from the previous rnd. 1 sc in 1st st, 1 sc2tog. 1 sc in next 9 [11] sts. *1 sc2tog. 1 sc in next st. Repeat from the * 5 times. 1 sc in next 9 [11] sts. 1 sc2tog. 1 sc in next st. Do not sl st in 1st sc of this rnd. (32 [36] sts)
+ BUTTON STRAP
Left Bootie Strap
Rnd 6 [7]: Start crocheting in 1st st from the previous rnd. 1 blsc in the next 22 [24] sts. Ch10 [12] (this create button strap). 1 hdc in 2nd ch from hook. Ch1, 1 hdc in next 8 [10] ch sts. 1 blsc in 23rd [25th] of ‘Rnd 6’. 1 blsc in next 9 [11] sts. Sl st in 1st st of this rnd.
Fasten off, and weave in loose ends.
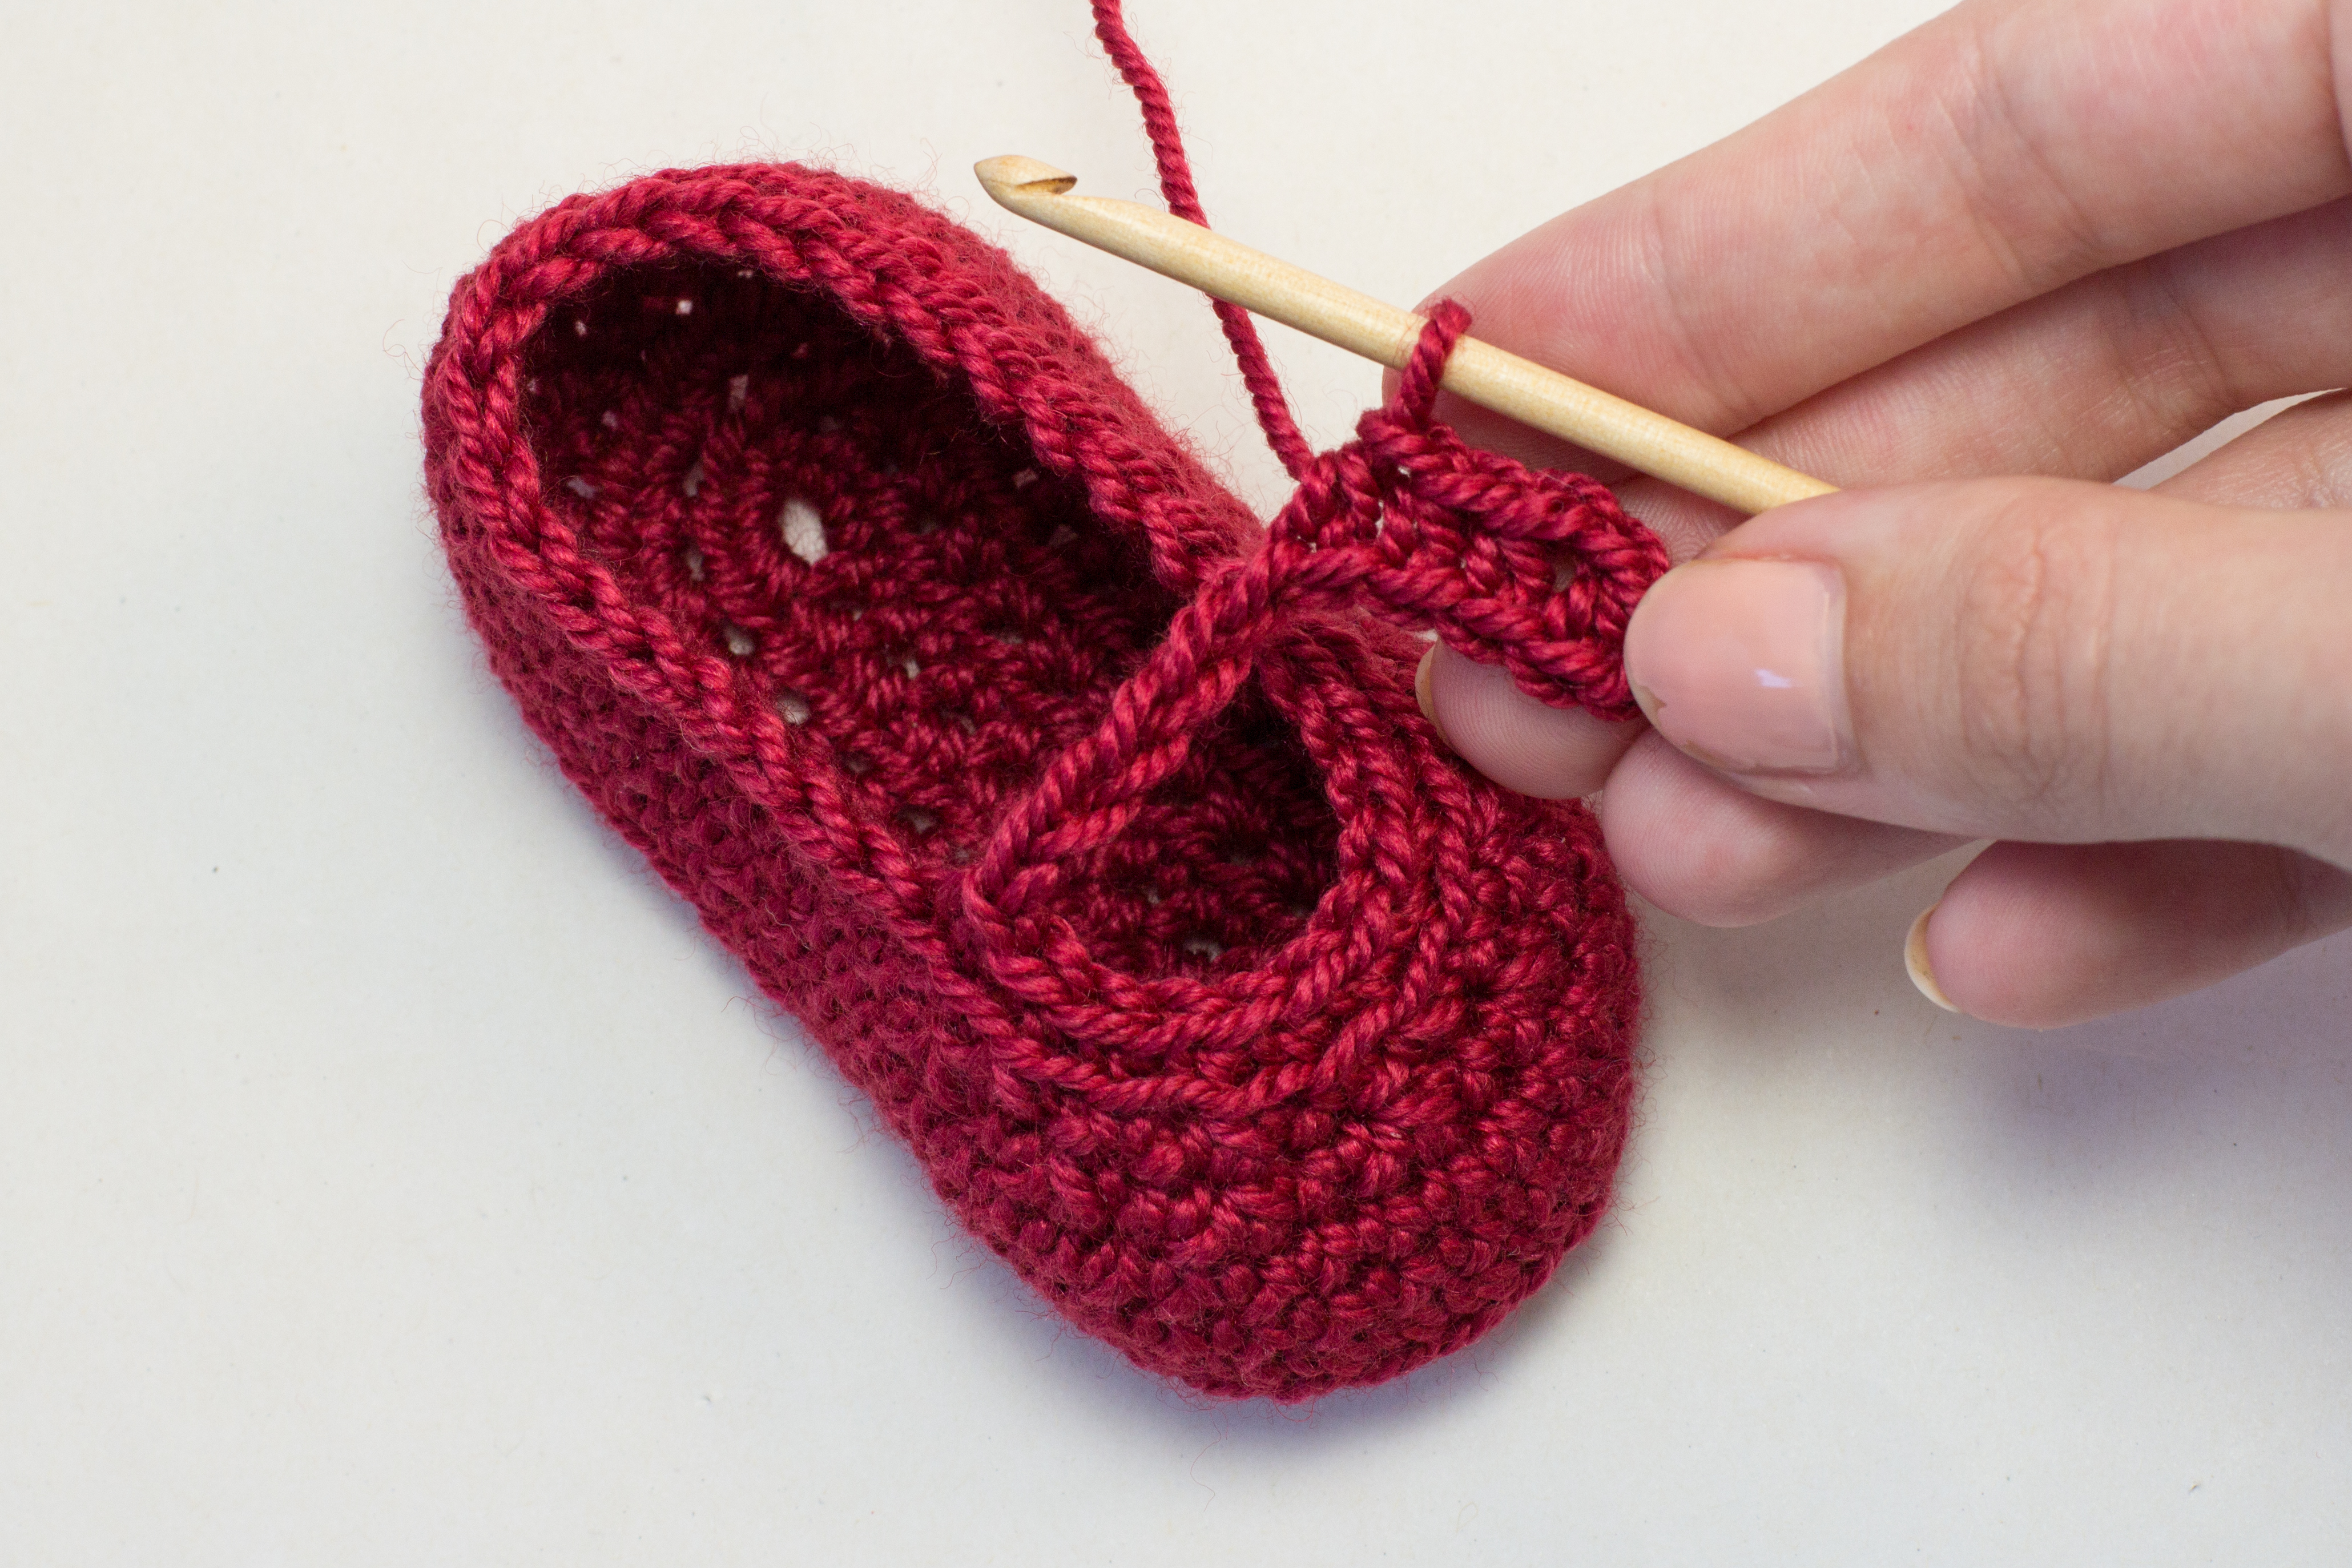
Right Bootie Strap
Rnd 6 [7]: Start crocheting in 1st st from the previous rnd. 1 blsc in the next 10 [12] sts. Ch10 [12] (this create button strap), 1 hdc in 2nd ch from hook. Ch1, 1 hdc in next 8 [10] ch sts. 1 blsc in 11th [13th] of ‘Rnd 6’. 1 blsc in next 21 [23] sts. Sl st in 1st st of this rnd.
Fasten off, and weave in loose ends.
+ BOW
Bow
Row 1: Ch7 [8] using yarn and 3.50mm crochet hook, 1 sc in 2nd ch from hook, 1 sc in next 5 [6] sts. Turn work. (6 [7] sts)
Row 2 – 24: Ch1, 1 sc in same st. 1 sc in next 5 [6] sts. Turn work. (6 [7] sts)
Fasten off, and weave in loose ends.
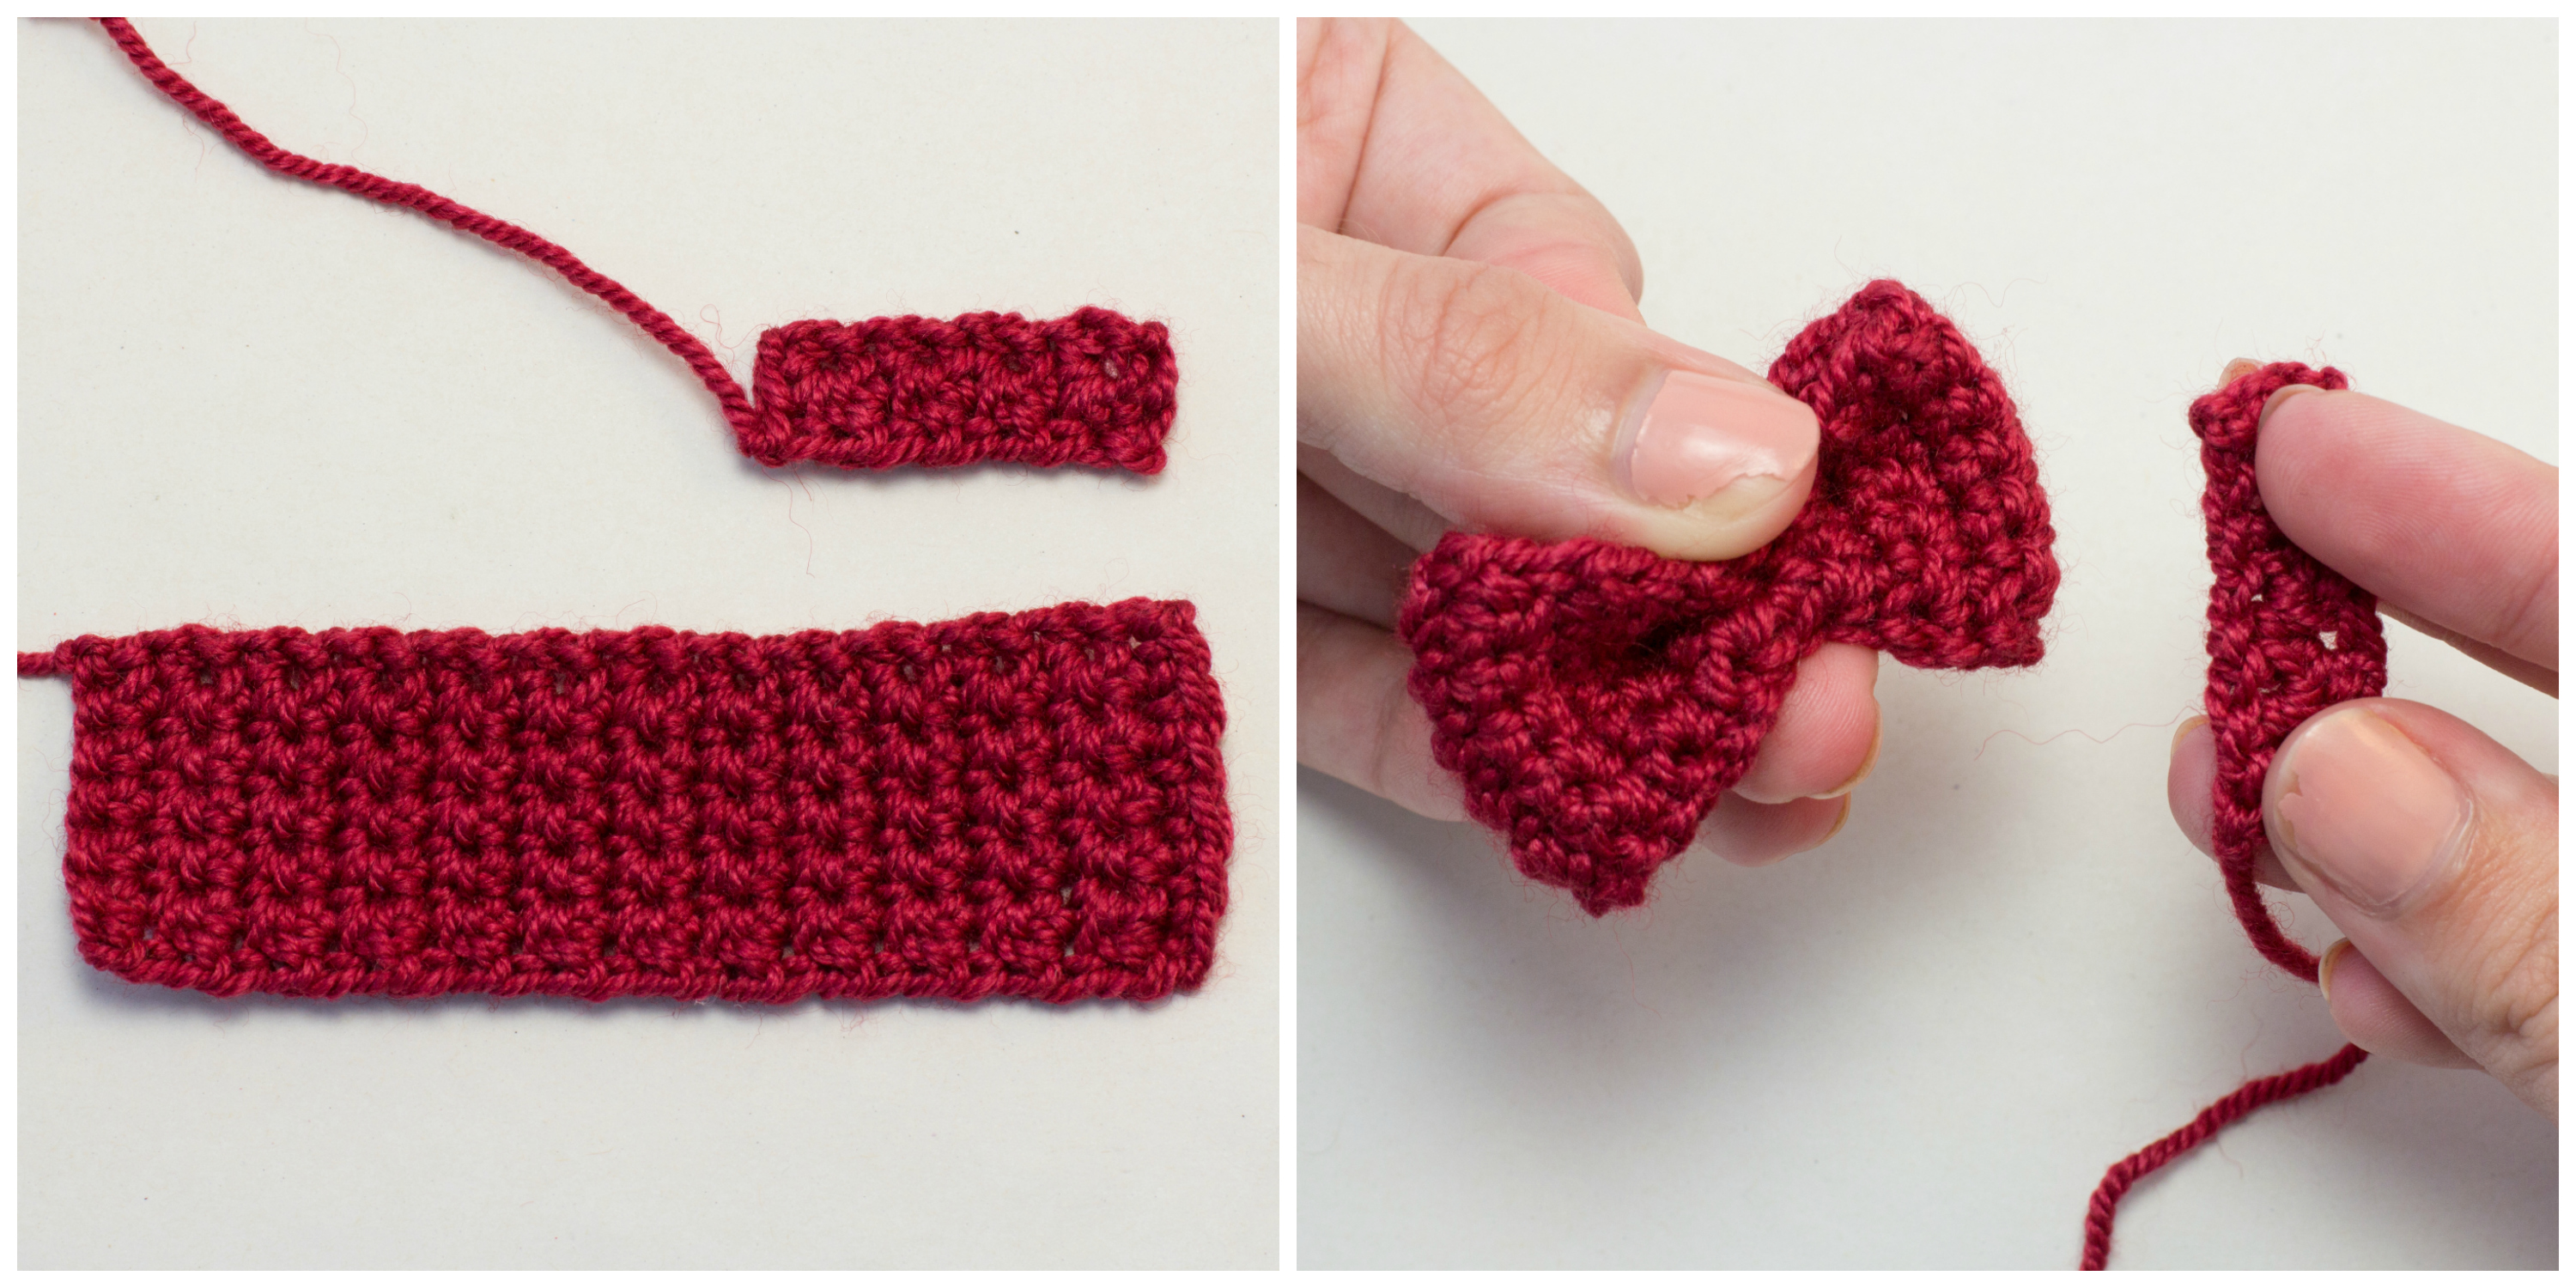
Band of Bow
Row 1: Ch3 [3] using yarn and 3.50mm crochet hook, 1 sc in 2nd ch from hook, 1 sc in next st. Turn work. (2 [2] sts)
Row 2 – 8: Ch1, 1 sc in same st. 1 sc in next st. Turn work. (2 [2] sts)
Fasten off, and weave in loose ends.
+ FINISHINGS
Sew the ends of the “Bow” together to create a circle (row 1 and row 24). Wrap the “Band of Bow” around the centre of the “Bow”, and sew together at back of “Bow”
Sew 1 bow on each bootie, towards the front.

Hope you all enjoy this pattern for a pair of dainty baby booties.
Be sure to use the tag #hopefulhoneyhive on Instagram to show me your version of my design!
Have a lovely day crocheting…


So cute. Thank you for sharing this pattern.
great and nice to view thanks for sharing wonderful picture here
Thanks for the pattern! I tried attaching the bow but actually preferred the booties without them, so I left it off.
3 things I noticed:
1. I used thicker yarn than the one listed and ended up with smaller booties!! I must have a tight gauge.. I ended up sizing up to a 4mm hook and using the 6-12 month size to get a 9.5cm length bootie.
2. When it says ‘repeat 7 times’ the first time is included as one time. Other people in the comments have mentioned this. I think, for example, “(1sc2tog, 1sc) 7 times” would be more clear.
3. I was a bit confused with fastening off at the sole and reattaching ‘at the heel’ for the top part of the shoe. Does that mean the other side of the sole to where you fasten off? I did one shoe where I reattached on the other side and one shoe where I just kept working the top of the shoe without detaching the yarn at all, and the shoes look pretty much the same.
Adorable, thank you for sharing. I would like to point out that I found a section in the pattern that does not belong:It is listed as Pattern: and it is under the diagram tutorial of the Sc2tog. It states,"Note: The hat and antenna are worked in the round, from top to bottom. The playsuit is worked in the round from top to bottom, as well as worked in the row from side to side (to create leg openings)."
I will have to try this! It's sooooo cute!
Love these! Are the buttons meant to attach to the strap and sewn into the bootie so they’re permanently attached, or is the button meant to be openable?
So cute! Thanks for sharing!
Thank you for the pattern! Very good idea! 🙂
pretty little ruby slippers for a really cute girl
My daughter was addicted to Dorothy and her Ruby Red Slippers. I can hardly wait to make these for her baby!
this will be great for babies, we give ever year at Christmas, Thank You!!
I want to try to make the booties in white for my great niece’s baptism. Thank you for sharing the pattern.
Love it! On the Red Ruby Booties, When I added the bow it seemed bulky and thick but looking at it after completion, it is so cute, perfect. Next one will add another round before adding back stitch❤ Thank You for posting such a cute pattern.
Hello. I am a beginner in reading patterns so I think I made a few mistakes during the making (its still cute but I need to remake it :D) When something is in ** do I have to make that one and repeat at said time or only make it at the “repeat x times”. Sorry if my question is a bit confusing 🙂
I was unsure about that too, but I did “only make it at the ‘repeat x times'” so if it says “repeat 5 times” you’re doing it 5 times total, not doing one set and then repeating 5 times. Hopefully that helps.
Thank you for replying
I recently started to crochet and just easy simple patterns following from YouTube. I wanted to learn how to follow them online and I’m so happy with how it turned out. I’ve made one little mistake which was easy to fix and I can’t wait to go out and get more wool. So thorough and all in detail. Thank you so so much for providing this pattern. It’s beautiful!
Thanks for this beautiful pattern
Estoy algo confundida,el término hdc se refiere a medio punto, o medio punto alto?? agradecería mucho su ayuda..
hdc = half double crochet stitch, there’s a link to a tutorial for it at the start of the pattern. Hope this helps! 🙂
baby shoes very cute! I would like to make them!
Yes I enjoyed the patterns..
Is there a printable version of this pattern?
Beautiful – thank you!
Round 3 of the sole doesn’t come out right for me. There are too many stitches. It takes me past the beginning stitch of round. Anyone else having this trouble? How do I fix it?
I was doing the smaller size.
I’ve just tried it now and got the same thing, but if I only do 2 repeats of the last “*2 hdc in next st. 1 hdc in next st” part, instead of 3 like the pattern says, I end up with 46 stitches which is what you’re wanting. So I think where it says 3 repeats, it should just be two.
Thank you! I was pulling my hair out trying to figure out how to fix round 3!
Thanks for sharing..😘
Me encantó este patrón. Lo quiero hacer para mi bebé.
so pretty thank you
Thank you very much for this cute pattern
these are adorable! thank you for sharing the pattern.
Your bow baby shoes turned out so cute, what a fantastic idea! I wanted to drop a quick message to let you know that I’ve featured your tutorial on Crafts on Display, hope you enjoy it! – https://craftsondisplay.com/crochet/free-mary-jane-baby-booties-pattern-73460/
Thank you so much for this pattern. It’s so easy to follow and they turned out so cute! These will be the perfect gift for my great niece and other little ones O can bless. ❤️
Hey just a note on formatting, I could access the pattern via mobile, but on desktop, all of the comments were overlayed on top of the pattern, and I couldn’t access it.
Hey can you share me pattern for one year old
Excellent pattern
This Ruby Red Mary Jane Booties crochet pattern is absolutely lovely. I love the classic Mary Jane style and beautiful design details. The instructions are clear and easy to follow, making it a great project for creating charming handmade baby booties.