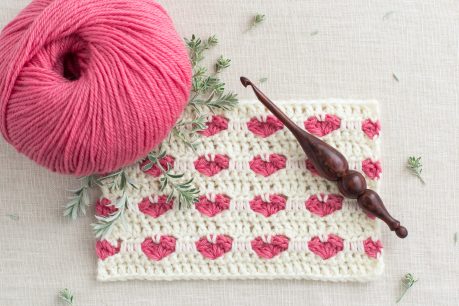
How To: Crochet The Picot Single Crochet – Easy Tutorial
From day one of crocheting I immediately fell in love with all the textures you can create with some yarn and the twirl of a hook…
Any stitch that has bobbles worked into it becomes an obsession of mine as soon as I learn it, as they are just so darn cute!The other day I unpackaged some of the yarn the delightful people over at Sirdar sent me, and at the top of the parcel was this gorgeous cotton yarn in this peaceful blue shade. Just like any other crocheter would do, I excitedly started fiddling around with it and in the process learned the Picot Single Crochet stitch!
The Picot Single Crochet creates the cutest and tiniest little bobbles, which has me head-over-heels with this stitch as I’m sure it would create the sweetest baby blankets and most whimsical scarves!
If you’re an avid crochet-a-holic and excited to soak up some extra crochet knowledge, this helpful video will guide you through all the necessary steps to learn the “Picot Single Crochet Stitch” (in an easy to follow speed), as you continue on your ever-growing crochet journey!

Materials
Yarn – Sirdar Cotton Rich Aran (Aran/10ply)
Crochet Hook – 4.0mm (G/6)
Stitches & Abbreviations
st(s) – stitch(es)
ch – chain stitch
sc – single crochet
psc – picot single crochet
Foundation
Chain in multiple of 2 + 1.
Pattern
Row 1: Ch1, 1 sc in 2nd ch from hook. Crochet 1 sc into every ch st, all the way to the end. Turn your work.
Row 2: Ch1, 1 sc in the same st. *1 picot single crochet in the next st. 1 sc in the next st. Repeat from the * all the way to the end. Turn your work.
Row 3: Ch1, 1 sc in the same st. Crochet 1 sc into every st, all the way to the end. Turn your work (Tip: Push the picot single crochet towards the front, to help see the top of the st to work into it).
Row 4: Ch1, 1 sc in the same st. 1 sc in the next st. *1 psc in the next st. 1 sc in the next st. Repeat from the * until 1 st remains. 1 sc in the next st. Turn your work.
Row 5: Ch1, 1 sc in the same st. Crochet 1 sc into every st, all the way to the end. Turn your work (Tip: Push the picot single crochet towards the front, to help see the top of the st to work into. Make sure that all the picot single crochets in every row are pushed towards the front/same side.
Repeat
Row 2 – 5 until you reach your desired length.
Is there a specific crochet stitch or interesting technique you’d love to learn? I’m always open to new ideas and inspiration when it comes to sharing crochet with the world!
Be sure to use the tag #hopefulhoneyhive on Instagram to show me your mini bean stitches!
Have a lovely day crocheting…


Thanks for posting this pretty crochet stitch tutorial. I am surely going to use this one. I can just see it made into a purse, hat and scarf or even a baby blanket.
Mabel
Love this stitch and already using it in a scarf I am making for a local charity, thanks for the tut, really easy to follow, Colette xx
Thank you for posting this beautiful piece. This happens to be one of my favorite stitches as well. There is so much you can do with this stitch. Love it. Thank you.
Very good idea you've shared here, from here I can be a very valuable new experience.
Very cute and you've made it very easy to understand!
Your tutorial has the perfect pace and amount of detail! Not too fast, not too slow. Thanks!
Thank you for the excellent tutorial !!
I love your tutorial because the instructions are spoken in a clear and precise fashion and the best bit I can watch it multiple times until I get it. Thank you so much
The granule sew is a pattern of alternating picot single crochets (abbreviated %) and normal unmarried crochets (sc). Historically writing, the granule stitch is worked with the p.C sts staggered in each row, so that you’d start with a multiple of four, plus 1, plus 1 for the beginning chain (or if starting with fsc, just a more than one of four plus 1).
Love it. Thank you for teaching me. Your a great teacher.
Thanks for the perfect tutorials. Love this pattern. Your voice came in sooo clear for understanding this pattern concept. Thanks for a great tutorial.
I really like your educational because the commands are spoken in a clear and particular fashion and the exceptional bit able to watch it more than one time until I get it. The superb idea you have shared right here, from here I can be a completely precious new experience. Dissertation Help in UK
Thanks for sharing the video , good explanations .
Me gusta mucho tu blog gracias por compartir con las personas que deseamos aprender
Your tutorial is fantastic! Easy to follow, and helps me so much. Thank you.
Dear Olivia thank you for teaching me how to make the picot single crochet, I absolutely loved this stitch. I needed one more square for a blanket I’m making. I think I will come up with some things that I can use this stitch on. So thank you so much, I have made some of your patterns and I am always so happy with the results, so I’m sure I will follow you on Pinterest and Ravelry. Yvonne Mannoly