• Skip to primary navigation
  • Skip to footer navigation
  • Skip to content
Display Search Bar
Follow Hopeful Honey on Facebook! Follow Hopeful Honey on Twitter! Follow Hopeful Honey on Pinterest! Follow Hopeful Honey on Instagram! Follow Hopeful Honey on YouTube!

Hopeful Honey

Craft, Crochet, Create

  • Home
  • About
  • Patterns
    • Women
      • Cowls + Scarves
      • Free Patterns
      • Hats + Headbands
      • Ponchos + Ruanas
      • Sweaters + Cardigans
      • Wraps + Shawls
      • View All
    • Home
      • Baskets
      • Blankets + Throws
      • Free Patterns
      • Holiday Themed
      • Home Accessories
      • View All
    • Children
      • Animal Themed
      • Cowls + Scarves
      • Free Patterns
      • Hats + Headbands
      • Sweaters + Cardigans
      • View All
    • Baby
      • Animal Themed
      • Booties + Sandals
      • Free Patterns
      • Hats + Headbands
      • Sweaters + Cardigans
      • View All
  • Tutorials
    • Basic Crochet StitchesUS Terms
    • Basic Crochet StitchesUK Terms
    • Crochet Stitchionary & Techniques
  • Shop
  • Contact
    • My Contact Info
    • Advertising Info
    • Site Policies

DIY Boho Macrame Hanging Jars

June 9, 2015 Category: DIY / Patterns

Share Share on Facebook Share on Twitter
5
Other than the whimsical decorated jars I shared last week, I also created about 70 of these hanging decorations for my friend’s wedding. 
But even if you’re not getting married anytime soon, a hanging jar would be perfect as a herb planter, or even as a candle holder for any outdoor dinner parties you might have in the summer with friends.

What You’ll Need
Measuring Tape
Jars (Medium to large sizes)
Scissors
Twine

1.   Cut 6 pieces of twine, making sure each strand is 68″ in length. Gather all the strands together, fold them in half and tie the top into a looped knot.
2.   Separate the twine into six groups of two strands, then tie each new group in a simple knot about one inch away from the large knot. 

3.   Split each knotted group (you made in the previous step) and create new groups of two. Tie these new groups in a knot about one inch away from the previous knot. Repeat this step multiple times, until the net fits perfectly around the jar you chose. Every jar is different, and will require different amount of knotted layers. {Note: You can easily create different designs for your macrame jars by tying the knots on each layer less or more than an inch.}

4.   Place your jar inside of the macrame net. Then take a piece of twine (about 30″ in length) and fold it in half. Tie this piece of twine around the top of the jar, making sure the knots from the last layer you created are above this piece of twine.
5.   Group 2 sets of 2 strands, and tie them together just above the rim of the jar. Repeat all around. You should have 3 groups of 4 strands each now.

6.   Tie all of the strands together at the top, about 7-8″ above the jar. Seperate the strands into groups of 6. Braid each group of 6 till the braid measures about 3-4″.
7.   Tie the 2 braids together, about 2″ above the knot at the bottom of the braids. Trim any excess twine at the top. Add your flowers or plants and you’re all done!

Hope you all enjoyed creating these vintage inspired hanging jars!
Have a lovely day crafting,
Youtube | Facebook | Bloglovin’ | Pinterest | Instagram | Etsy

  • Glencoe Tartan Poncho Crochet Pattern
  • Florence Backpack Crochet Pattern
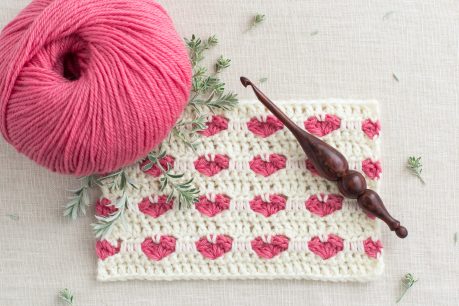
  • How To: Crochet The Heart Stitch - Easy Tutorial

Reader Interactions

Comments

    Leave a Note Cancel reply

  1. Marie Sophie Digne says

    June 9, 2015 at 4:58 pm

    So nice ! great idea !!!

    Reply
  2. Anonymous says

    April 25, 2016 at 3:34 am

    I love this idea, I know you made a bunch, did you find a cheap source for buying "bulk" twine???

    Reply
  3. Shelley Hite says

    June 19, 2016 at 8:31 pm

    Brillant idea. I live in a apartment with a patio. My biggest hurdle has been in trying to create some privacy. I am already thinking of the ways I could string 3 or 4 of these together vertically (making 5-6 vertical Strings), and then hanging each unit a foot or so apart from the overhang. Thanks so much for the idea.

    Reply
  4. ankita says

    December 15, 2017 at 7:09 am

    its really nice i like it

    Reply
  5. parul says

    December 15, 2017 at 7:11 am

    its great really i like it

    Reply

Follow Along on Instagram @HopefulHoney

Copyright © Hopeful Honey Olivia Kent 2025
  • Policies
  • Contact
Follow Hopeful Honey on Facebook! Follow Hopeful Honey on Twitter! Follow Hopeful Honey on Pinterest! Follow Hopeful Honey on Instagram! Follow Hopeful Honey on YouTube!
Designed by Melissa Rose Design Developed by Once Coupled