• Skip to primary navigation
  • Skip to footer navigation
  • Skip to content
Display Search Bar
Follow Hopeful Honey on Facebook! Follow Hopeful Honey on Twitter! Follow Hopeful Honey on Pinterest! Follow Hopeful Honey on Instagram! Follow Hopeful Honey on YouTube!

Hopeful Honey

Craft, Crochet, Create

  • Home
  • About
  • Patterns
    • Women
      • Cowls + Scarves
      • Free Patterns
      • Hats + Headbands
      • Ponchos + Ruanas
      • Sweaters + Cardigans
      • Wraps + Shawls
      • View All
    • Home
      • Baskets
      • Blankets + Throws
      • Free Patterns
      • Holiday Themed
      • Home Accessories
      • View All
    • Children
      • Animal Themed
      • Cowls + Scarves
      • Free Patterns
      • Hats + Headbands
      • Sweaters + Cardigans
      • View All
    • Baby
      • Animal Themed
      • Booties + Sandals
      • Free Patterns
      • Hats + Headbands
      • Sweaters + Cardigans
      • View All
  • Tutorials
    • Basic Crochet StitchesUS Terms
    • Basic Crochet StitchesUK Terms
    • Crochet Stitchionary & Techniques
  • Shop
  • Contact
    • My Contact Info
    • Advertising Info
    • Site Policies

Rosetta Headband Crochet Pattern

July 29, 2014 Category: Crochet / Hats + Headbands / Patterns / Vintage

Share Share on Facebook Share on Twitter
9
Since a very young age I’ve always imagined what it would be like to be a graceful fairy. To be able to fly through a peaceful forest, or sit on a dainty little flower would be a dream come true.
I have to admit that while crocheting this headband I couldn’t help but think, “There’s something about this headband that just oozes with pixie dust.” 
In fact, I wouldn’t be surprised that while strolling through a field of flowers a fairy might just mistake you for a fellow little fairy!

What You’ll Need

3.50mm Crochet Hook
20g DK {8ply} Cotton Yarn
1 Pearl Button {1 inch x 1 inch} – I got mine HERE
Tapestry/Wool Needle
Scissors

Finished Size

This headband fits all sizes

{Easily adjustable, as explained in pattern}

 ~ Flower ~

Small Flower
Round 1~ Taking your 3.50mm crochet hook and cotton yarn, start of by making a Slip Knot, then crochet 3 Chains. Crochet 9 Half Double Crochets into the first chain you made. Slip Stitch into the top of chain 3. You should have 10 half double crochets now.

Round 2~ Chain 2, then crochet a Half Double Crochet into the same stitch. Crochet 2 Half Double Crochets into every stitch all around. Slip Stitch into the top of chain 2. You should have 20 half double crochets now.
Round 3~ Chain 1. *Crochet 1 Double Crochet, 1 Triple Crochet and 1 Double Crochet into the next stitch, then crochet 1 Slip Stitch into the next stitch. Repeat from the * mark all around. Slip Stitch into the top of chain 1. {Note: You should have 10 flower petals now.}
Fasten off, and weave in loose ends.


Big Flower
Round 1~ Taking your 3.50mm crochet hook and cotton yarn, start of by making a Slip Knot, then crochet 3 Chains. Crochet 9 Half Double Crochets into the first chain you made. Slip Stitch into the top of chain 3. You should have 10 half double crochets now.

Round 2~ Chain 2, then crochet a Half Double Crochet into the same stitch. Crochet 2 Half Double Crochets into every stitch all around. Slip Stitch into the top of chain 2. You should have 20 half double crochets now.
Round 3~ Chain 2, then crochet a Half Double Crochet into the same stitch. *Crochet 1 Half Double Crochet into the next stitch. Then crochet 2 Half Double Crochets in the next stitch.  Repeat from the * all around. Crochet 1 Half Double Crochet in the last 3 stitches. Slip Stitch into the top of chain 2. You should have 29 half double crochets now.
Round 4~ Chain 1. *Skip 1 stitch, then crochet 2 Double Crochets, 1 Triple Crochet and 2 Double Crochets into the next stitch. Skip 1 stitch, then crochet 1 Slip Stitch into the next stitch. Repeat from the * mark all around. Slip Stitch into the top of chain 1. {Note: You should have 7 flower petals now.}
Fasten off, and weave in loose ends.
Taking your tapestry needle and yarn, sew the small flower on top of the big flower.
After creating the flower, sew the pearl button in the middle of the flower.

~ Braided Band ~

Cut 9 strands of cotton yarn, making sure each strand is 46 inches
long. Tie a knot 1 inch from the end. Make
a loose braid, then
tie a knot 1 inch from the end.
{Note: If you’d like to make this headband for a smaller or larger size, just make the braid shorter or longer. My braid measured approx. 35 inches once completed.}


Hope you all enjoyed this adorable summery pattern!

If you did crochet this, please post a photo of your creation onto my Facebook Page.
I’d love to see it!
Have a lovely day crocheting,

Youtube | Facebook | Bloglovin’ | Pinterest | Instagram | Etsy

  • Glencoe Tartan Poncho Crochet Pattern
  • Florence Backpack Crochet Pattern
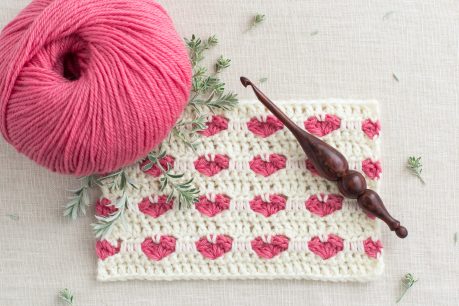
  • How To: Crochet The Heart Stitch - Easy Tutorial

Reader Interactions

Comments

    Leave a Note Cancel reply

  1. Sambaxd Ever says

    July 29, 2014 at 5:15 pm

    great blog!

    Reply
  2. philipe44 says

    July 30, 2014 at 5:43 am

    so nice:-)

    Reply
  3. savanah vanmiddendorp says

    August 3, 2014 at 11:31 pm

    Aw! I absolutley love this pattern!!!! All your creations are so whimsical and lovely Olivia!

    Reply
  4. send flowers and gifts to philippines says

    September 12, 2014 at 8:29 am

    Love this pattern! This would be a perfect gift I think.

    Reply
  5. bethany dearden says

    February 23, 2015 at 8:57 pm

    So so beautiful! Wonderful job and it looks so lovely on you 🙂

    Reply
    • Olivia Kent says

      February 24, 2015 at 12:40 am

      Thanks Bethany, so glad you like it! 😀

      Reply
    • rosethinkingoutloud says

      December 27, 2015 at 2:00 am

      The band makes no sense. What are the instructions for Braiding 9strands. Finished 35. My head is only 23 around. Don't know of anyone with a head of 35 inches. Help. Have the flower but can't figure out the headband

      Reply
  6. ankita says

    December 14, 2017 at 8:54 pm

    its really nice i like it

    Reply
  7. parul says

    December 14, 2017 at 8:55 pm

    its great really i like it

    Reply

Follow Along on Instagram @HopefulHoney

Copyright © Hopeful Honey Olivia Kent 2023
  • Policies
  • Contact
Follow Hopeful Honey on Facebook! Follow Hopeful Honey on Twitter! Follow Hopeful Honey on Pinterest! Follow Hopeful Honey on Instagram! Follow Hopeful Honey on YouTube!
Designed by Melissa Rose Design Developed by Once Coupled