• Skip to primary navigation
  • Skip to footer navigation
  • Skip to content
Display Search Bar
Follow Hopeful Honey on Facebook! Follow Hopeful Honey on Twitter! Follow Hopeful Honey on Pinterest! Follow Hopeful Honey on Instagram! Follow Hopeful Honey on YouTube!

Hopeful Honey

Craft, Crochet, Create

  • Home
  • About
  • Patterns
    • Women
      • Cowls + Scarves
      • Free Patterns
      • Hats + Headbands
      • Ponchos + Ruanas
      • Sweaters + Cardigans
      • Wraps + Shawls
      • View All
    • Home
      • Baskets
      • Blankets + Throws
      • Free Patterns
      • Holiday Themed
      • Home Accessories
      • View All
    • Children
      • Animal Themed
      • Cowls + Scarves
      • Free Patterns
      • Hats + Headbands
      • Sweaters + Cardigans
      • View All
    • Baby
      • Animal Themed
      • Booties + Sandals
      • Free Patterns
      • Hats + Headbands
      • Sweaters + Cardigans
      • View All
  • Tutorials
    • Basic Crochet StitchesUS Terms
    • Basic Crochet StitchesUK Terms
    • Crochet Stitchionary & Techniques
  • Shop
  • Contact
    • My Contact Info
    • Advertising Info
    • Site Policies

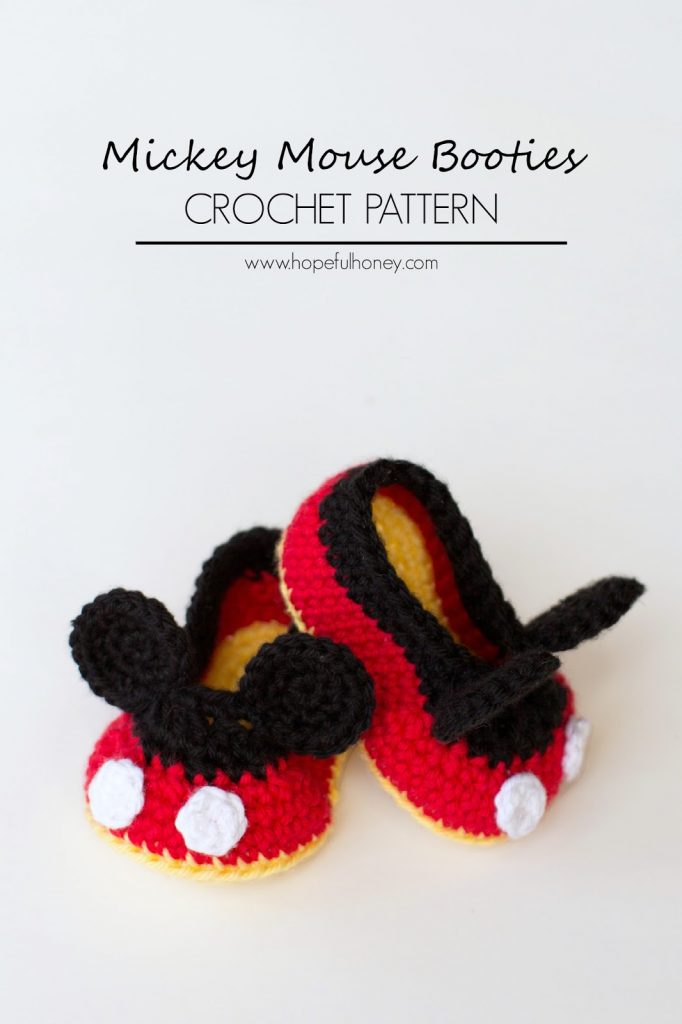
Mickey Mouse Inspired Baby Booties Crochet Pattern

March 10, 2015 Category: Baby / Crochet / Patterns

Share Share on Facebook Share on Twitter
41

I know this may seem hard to believe, but I’ve never been to Disney World!
I’d love to go one day as I’m still a kid at heart, and greatly appreciate bright colours and quirky musicals.

One of the many other reasons I also love Disney is for their wise and insightful quotes…
“Happiness is not about having or not having problems. Everyone has problems but not everyone is unhappy.” – Mickey Mouse


Materials

3.50mm (E) Crochet Hook
8ply
Yarn (DK) – Paintbox Yarns Cotton DK

Tapestry/Yarn Needle
Scissors
Size
0 – 6 month old
Sole Length, 9cm

Gauge
4 rows x 5 stitches in hdc = 1 inch

Mickey Mouse Baby Hat Pattern HERE!

Pattern

Sole
Taking your 3.50mm crochet hook and DK yellow yarn, start of by making a Slip Knot, then crochet 11 Chains.
Round 1~
Crochet 2 Half Double Crochets into the second chain from your hook. Crochet 1 Half Double Crochet into the next 8 chains. Crochet 6 Half Double Crochets into the last chain. {Note: You are now going to be working on the opposite side of foundation chain.} Crochet 1 Half Double Crochet into the next 8 stitches. Crochet 2 Half Double Crochets into the last stitch. You should
have 26 stitches now. Do not slip stitch into the first half double crochet of this round.
Round 2~ Start crocheting in the first stitch from the previous round. Crochet 2 Half Double Crochets in the next 2 stitches. Crochet 1 Half Double Crochet into the next 8 stitches. Crochet 2 Double Crochets in the next 6 stitches. Crochet 1 Half Double Crochet into the next 8 stitches. Crochet 2 Half Double Crochets in the next 2 stitches. You should have 36 stitches now. Do not slip stitch into the first half double crochet of this round.
Round 3~ Start crocheting in the first stitch from the previous round. Crochet 1 Half Double Crochet in the next 2 stitches. Crochet 2 Half Double Crochets in the next 3 stitches. Crochet 1 Half Double Crochet in the next 5 stitches. Crochet 1 Double Crochet in the next 3 stitches. *Crochet 2 Double Crochets in the next stitch. Crochet 1 Double Crochet in the next stitch. Repeat from the * 6 times. Crochet 1 Double Crochet in the next 3 stitches. Crochet 1 Half Double Crochet in the next 5 stitches. Crochet 2 Half Double Crochets in the next 2 stitches. Crochet 1 Half Double Crochet and 1 Single Crochet in the next stitch. Slip Stitch into the first stitch of this round. You should have 48
stitches now.
Fasten off, and weave in loose ends.

Top Of Shoe
Round 1~ Attach your red yarn right in the middle of the
heel. Chain 1, crochet 1 Single Crochet into the same stitch, but only through the back loop. {Note: Continue crocheting the stitches in this round, only in the back loop.} Crochet 1 Single Crochet in the next 47 stitches. Do not slip stitch into the first single crochet of this round.

Round 2 – 3~ Start crocheting in the first stitch from the previous round. Crochet 1 Single Crochet in every stitch all around. Do not slip stitch into the first single crochet of this round.
Round 4~ Start crocheting in the first stitch from the previous round. Crochet 1 Single Crochet in the next 14 stitches. *Crochet 1 Single Crochet Decrease. Crochet 1 Single Crochet in the next stitch. Repeat from the * 7 times. Crochet 1 Single Crochet in the next 13 stitches. Do not slip stitch into the first single crochet of this round. You should have 41 stitches now.
Round 5~ Change yarn colour to black. Start crocheting in the first stitch from the previous round. Crochet 1 Single Crochet in the first stitch. Crochet 1 Single Crochet Decrease. Crochet 1 Single Crochet in the next 10 stitches.  *Crochet 1 Single Crochet Decrease. Crochet 1 Single Crochet in the next stitch. Repeat from the * 5 times. Crochet 1 Single Crochet in the next 10 stitches. Crochet 1 Single Crochet Decrease. Crochet 1 Single Crochet in the next stitch. Do not slip stitch into the first single crochet of this round. You should have 34 stitches now.
Round 6~ Start crocheting in the first stitch from the previous round. Crochet 1 Single Crochet in the next 11 stitches. Crochet 2 Half Double Crochet Decreases. Crochet 2 Double Crochet Decreases. Crochet 2 Half Double Crochet Decreases. Crochet 1 Single Crochet in the next 11 stitches. Do not slip stitch into the first single crochet of this round. You should have 28 stitches now.

Round 7~ Start crocheting in the first stitch from the
previous round. Crochet 1 Single Crochet in every stitch all around. Slip Stitch into the first stitch of this round.
Fasten off, and weave in loose ends.
Repeat pattern to make a pair.

Ears

Round 1~ Taking your 3.50mm crochet hook and DK black yarn, start of by making a Slip Knot, then crochet 2 Chains. Crochet 6 Single Crochets into the first chain you made. Do not slip stitch into the first single crochet of this round. You should have 6 stitches now.

Round 2~ Start crocheting in the first stitch from the previous round. Crochet 2 Single Crochets in the first stitch. Crochet 2 Single Crochets into every stitch all
around. Do not slip stitch into the first single crochet of this round. You should have 12 stitches now.

Round 3~ Start crocheting in the first stitch from the previous round. Crochet 2 Single Crochets into the first stitch. *Crochet 1 Single Crochet into the next stitch. Crochet 2 Single Crochets into the next stitch. Repeat from the * all around. Slip Stitch into the first stitch of this round. You should have 18 stitches now.

Fasten off, and weave in loose ends.
Repeat pattern 4 times to make 2 pairs of ears.
Taking your tapestry needle, sew 2 ears onto the front of each bootie, towards the top.

White Buttons
Round 1~ Taking your 3.50mm crochet hook and DK white yarn, start of by making a Slip Knot, then crochet 2 Chains. Crochet 6 Single Crochets into the first chain you made. Slip Stitch into the first single crochet. You should have 6 stitches now.
Fasten off, and weave in loose ends.

Create 4 white buttons.
Taking your tapestry needle, sew 2 buttons onto the front of each bootie, making sure
to space them out evenly.

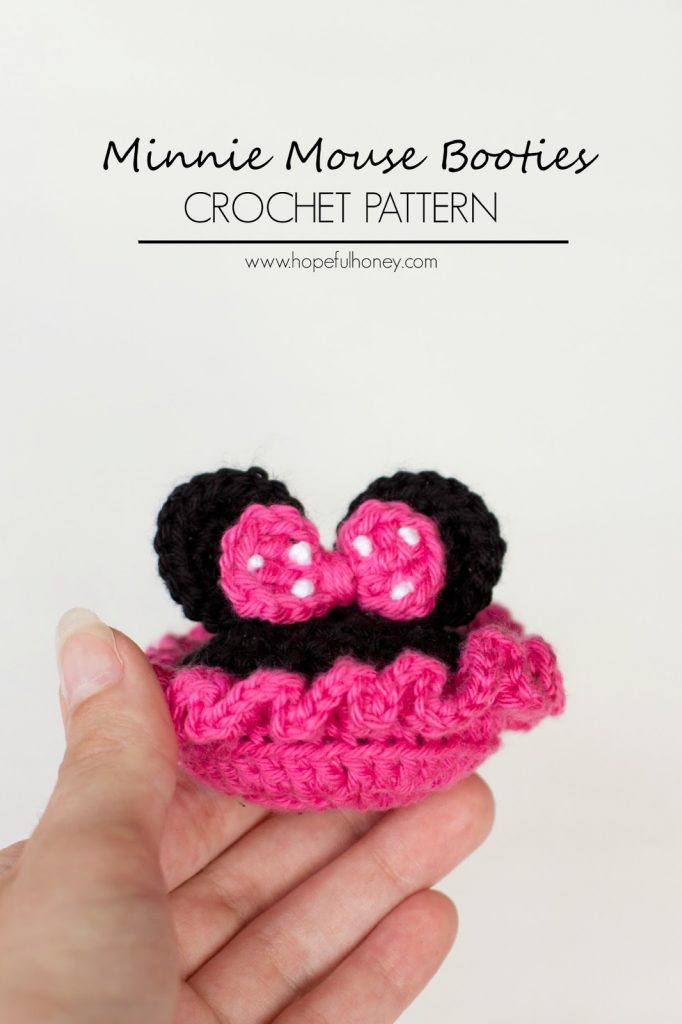
Minnie Mouse Baby Booties – Free Crochet Pattern

Hope you all enjoyed this Disney inspired pattern!

If you did crochet this, please post a photo of your creation onto my Facebook Page.
I’d love to see it!
Have a lovely day crocheting,
Youtube | Facebook | Bloglovin’ | Pinterest | Instagram | Etsy


SaveSave

  • Glencoe Tartan Poncho Crochet Pattern
  • Florence Backpack Crochet Pattern
  • How To: Crochet The Heart Stitch - Easy Tutorial

Reader Interactions

Comments

    Leave a Note Cancel reply

  1. Marisol Valencia says

    March 14, 2015 at 5:47 am

    Lindos gracias

    Reply
  2. Fe Marie Abergas says

    March 15, 2015 at 5:40 am

    <3

    Reply
  3. Debbie Hughes says

    April 5, 2015 at 7:53 pm

    Is this pattern in American terms?

    Reply
    • Olivia Kent says

      April 6, 2015 at 12:46 am

      All my patterns are written using US terms 🙂

      Reply
  4. Ashley says

    June 13, 2015 at 11:01 pm

    How can this be made into a larger slipper? Toddler and adult sized?

    Reply
  5. Anonymous says

    June 18, 2015 at 9:16 pm

    After printing the pattern, I had to go back and White Out the spots where the (Her, over here! Like me on Facebook and don't miss a thing!) That was three lines of printing I had to rewrite to almost all of the pages. Other than that, thanks for the cute Booties.

    Reply
  6. Anonymous says

    July 26, 2015 at 10:48 am

    this is so cute.. surely i will make one ..!! i love crochet..!!

    Reply
  7. Steve and Tina says

    August 18, 2015 at 11:38 am

    May I have permission to sell a few of these in my local craft booth? I just love them!

    Reply
  8. Sunny Smith says

    August 24, 2015 at 1:21 am

    I had a great time making these, they're adorable!!! Easy to follow instructions. Thank you SO much for sharing! 🙂

    Reply
  9. Heather Shina says

    August 24, 2015 at 11:15 pm

    How would I alter this into a toddler size? My little boy is OBSESSED with Mickey Mouse, but his little feet are still a bit too big for these. =)

    Reply
  10. Tara Miceli says

    August 30, 2015 at 6:13 pm

    This may be a silly question but when making the ridge (crocheting in the back loop only on the first red row) does the ridge end up being on the outside or inside of the booty?

    Reply
    • Olivia Kent says

      August 31, 2015 at 12:21 am

      Hello Tara,
      The ridge is on the outside 🙂
      Olivia

      Reply
  11. Anonymous says

    August 31, 2015 at 3:41 am

    will there be a big difference if i use 4ply yarn? I cant find 8ply yarn in our country. Thanks

    Reply
  12. Robin Laycock says

    October 7, 2015 at 7:07 pm

    Thank you SO much! My grandson LOVES Mickey! How would you make them big enough for a 20 month old?

    Reply
  13. Unknown says

    October 9, 2015 at 4:20 pm

    I'm not coming out right on round 4. when it says 1 SCD, 1 SC in next stitch, is the SC in the same stitch at the SCD? I'm coming out with either too many or not enough stitches depending how I do it. I have the 47 stitch count in the previous rows correct.

    Reply
    • Anonymous says

      January 6, 2016 at 12:51 am

      No it's SC in the next stitch then SCD in the next. If you click on the highlighted terms it brings you to a video tutorial for each stitch. 47 through round 3, round 4 is 41. Hope this helps.

      Reply
  14. Anca says

    October 9, 2015 at 11:35 pm

    Hi Olivia. First of all I am very happy that I have found your blog and your facebook page. You create beautiful things that I love to do by myself. 2 weeks ago I started to learn how to crochet using tutorial and free pattern. For 3 days I try to make this pattern but I think I dont understand very well the last round from sole. where the instruction stop I have 45 stitches, and another 4 to work. I would appreciate if you'd explain where is my mistake. Thank you very much.

    Reply
  15. Unknown says

    December 4, 2015 at 6:02 am

    Used 4ply yarn and the bootie came out for like a 1 or 2 year old. I'm going to try using a small needle. I had so much fun making this. Thank you

    Reply
  16. Bodynsoil says

    January 18, 2016 at 10:51 am

    I can't wait to try this pattern and will keep you posted.

    Reply
  17. Desiree Cosper says

    April 5, 2016 at 6:54 am

    Thank you for the free patterns. I really in joy making your patterns.

    Reply
  18. jane says

    April 30, 2016 at 1:02 am

    Adorable! Thank you so much for the pattern.

    Reply
  19. Nancy says

    June 12, 2016 at 12:27 am

    Thank you for the pattern. I just finished making my little granddaughter a pair and I know she'll love them.

    Reply
  20. Nancy says

    June 12, 2016 at 8:37 pm

    Thank you for the pattern. I just finished making my little granddaughter a pair and I know she'll love them.

    Reply
  21. febrina says

    October 3, 2016 at 5:24 am

    Thank you for your pattern….i love disney and i'm a beginner crochet lover… love it xoxo….

    Reply
  22. Anonymous says

    November 1, 2016 at 6:12 pm

    In your pattern round 4 it reads Crochet 1 single crochet decrease Crochet 1 single crochet in the next stitch. Is the decrease and the sc in the same stitch or separete. Fhank you

    Reply
  23. Anonymous says

    November 1, 2016 at 6:19 pm

    when you give instructions in * then Repeat 7 times. Will that be a total of 8 or just 7. Thank you

    Reply
    • Angela says

      June 30, 2019 at 1:27 pm

      I have the same question please

      Reply
  24. Kathy says

    December 11, 2017 at 1:41 pm

    Going to make them for my granddaughter’s 2nd birthday.

    Reply
  25. ankita says

    December 14, 2017 at 10:29 pm

    its really nice i like it

    Reply
  26. parul says

    December 14, 2017 at 10:31 pm

    its great really i like it

    Reply
  27. Aimz2688 says

    December 28, 2017 at 7:29 pm

    is it possible to make this in adult size and if so how would i go about doing that?

    Reply
    • Pascale says

      April 24, 2022 at 4:12 am

      I want to make the booties for a Child from 2 years.
      Is there a method to make them?

      Reply
      • Pascale says

        April 24, 2022 at 4:14 am

        I had the same question but no answer

        Reply
  28. Gaby says

    February 20, 2018 at 11:17 pm

    Bellissime grazie per le spiegazioni ben dettagliate.Gaby

    Reply
    • Pascale says

      April 24, 2022 at 4:13 am

      How many stitches for a 2 old Child?

      Reply
  29. Christina says

    August 24, 2018 at 12:46 pm

    How can I get Mickey bootie pattern without ads in between instructions.

    Reply
  30. Diane Plummer says

    November 3, 2018 at 11:44 am

    I’m 60 years old and never been to Disney World either.

    Reply
  31. kiersten says

    December 14, 2018 at 6:22 pm

    Hi i just have question i’m up to adding the red and it says attach the yarn in the middle of the heel. how do I attach it? sorry i’m fairly new so didn’t want to randomly attach it and do it wrong. thankyou

    Reply
  32. Sonia says

    April 2, 2020 at 4:02 pm

    It is a very nice patterns thank you for doing so!!

    Reply
  33. Erin Gabriel says

    October 6, 2020 at 9:04 am

    Very cute pattern 🙂

    Reply
  34. Mercedes Rodriguez says

    July 10, 2021 at 7:18 am

    I made both the Mickey and the Minnie pattern. The opening on both seem wider than your picture. So you have any suggestions to make the openings a little tighter?

    Reply

Follow Along on Instagram @HopefulHoney

Copyright © Hopeful Honey Olivia Kent 2022
  • Policies
  • Contact
Follow Hopeful Honey on Facebook! Follow Hopeful Honey on Twitter! Follow Hopeful Honey on Pinterest! Follow Hopeful Honey on Instagram! Follow Hopeful Honey on YouTube!
Designed by Melissa Rose Design Developed by Once Coupled